Want a dramatic kitchen upgrade without spending thousands or waiting weeks? The peel-and-stick backsplash trend lets you transform your space with pro-level results, often in a single afternoon. Save money, update your home"s style, and boost property value—all the benefits with none of the messy hassle.
Why Peel-and-Stick Backsplashes Are the Must-Try DIY for 2025
Home Maintenance costs reached new peaks this year, with the average North American homeowner spending $13,000 annually on improvements and repairs, reports Flex Seal Canada (2025). But routine maintenance and quick fixes are more popular than ever—36% of homeowners surveyed by Angi (2025) ranked small maintenance projects like kitchen refreshes top on their improvement lists. With peel-and-stick backsplashes leading the charge, it"s easier than ever to give your kitchen a modern, budget friendly facelift.
DIY Fixes: How Peel-and-Stick Kitchen Backsplashes Work
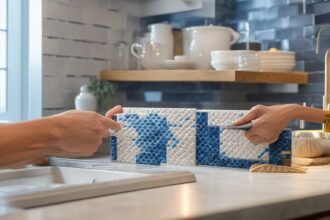
Unlike traditional tile installs that require grout, mortar, and specialized tools, peel-and-stick kits give everyone—beginners included—a simple route to stunning results. These products feature self-adhesive tiles in a range of styles, including subway, marble-look, bold geometric, and mosaic patterns. They protect walls from spills, moisture, and stains, while instantly updating the look of any space.
- Budget Friendly: Peel-and-stick backsplash tiles frequently cost 50-70% less than custom tile work, making them ideal for rental units, first-time owners, or anyone watching their spending.
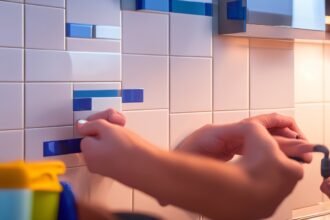
- Fast Installation: No need for power tools, wet saws, or messy grout—most backsplashes can be measured, cut, and applied with a utility knife and a straight edge in under 2 hours.
- Easy Removal: Unlike traditional tiles, peel-and-stick options can often be removed cleanly, making them perfect solutions for apartments, or spaces that need frequent updates.
Troubleshooting Common Issues: Pro Tips for Flawless Installations
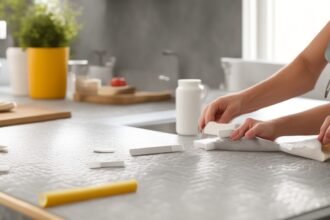
- Surface Preparation is Key: Clean your wall surface with a degreaser and let it completely dry before application. Any dust or grease will weaken adhesion and cause tiles to slip.
- Measure Twice, Cut Once: Dry-fit your tiles and layout before peeling the backing. Mark your boundary lines with a pencil and use a carpenter"s level to ensure rows stay perfectly horizontal.
- Mind Outlets and Fixtures: Cut tiles carefully around electrical outlets or awkward corners, using sharp utility blades. For tricky spots, trace shapes on the back of the tile for perfect cuts.
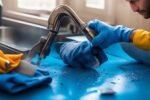
- Seal the Edges: For water-prone areas like behind sinks, use a thin bead of caulk around the perimeter to prevent moisture from sneaking behind your new backsplash.
Appliance Repair Meets Design: Extend the DIY Touch
The best DIY upgrades blend beauty and functionality. After finishing your backsplash, look for other small, high-impact appliance fixes:
- Touch Up Appliances: Use spray-on, heat-resistant paint to refresh old stoves or fridges. Liquid stainless steel or appliance enamel revamps surface color quickly.
- Replace Caulking: Old, cracked caulk leads to leaks behind appliances and counters. Scrape out failing caulk and replace it for extra water resistance and a cleaner look.
- Install New Hardware: Modern cabinet handles or sleek faucet replacements can completely change your kitchen"s visual appeal.
Safety Precautions: Essential Practices for DIY Success
- Wear Gloves and Eye Protection: When cutting tiles or caulk, prevent cuts and scrapes by using sturdy gloves and always wear safety glasses during installation.
- Shut Power Off: If your backsplash area includes outlets or built-in lights, switch off the power at your breaker box before working—never risk a shock.
- Ventilate: Use fans or open windows when painting, removing adhesives, or using caulk, especially if the product produces fumes.
Cleaning Hacks for Your Kitchen Upgrade
- Easy Wipe-Down: Choose backsplash tiles with a smooth or glossy finish—they resist stains and clean up with a quick swipe of damp cloth.
- Steam Clean Appliances: Make stovetops and microwaves shine with a handheld steam cleaner—no harsh chemicals required.
- Baking Soda Paste: Remove greasy buildup from your new backsplash by applying a paste of baking soda and water, letting it sit 10 minutes, then wiping clean.
Preventative Maintenance for Lasting Results
- Inspect Monthly: Check for loose or peeling tiles, especially near sinks and stoves. Address any issues quickly to avoid moisture getting behind tiles.
- Seal Annually: Refresh the caulk around counters and corners each year to prevent leaks behind the backsplash.
- Keep Tools Handy: A utility knife, straight edge, caulk gun, and cleaning cloths make small fixes easy and keep your kitchen looking fresh.
The DIY Advantage: Empowering Every Homeowner
With peel-and-stick kitchen backsplashes, anyone can tackle a major style update while keeping costs manageable. Even small changes—new tiles, caulk, or appliance paint—make a huge difference. The success rates for DIY repairs continue to rise: Lending Club notes that most homeowners can safely handle basic projects like painting, caulking, and patching holes, and many report saving up to 10% on annual energy bills just by sealing leaks and updating surfaces. Empower yourself to take control of your home maintenance, embrace DIY fixes, and troubleshoot with confidence.
Ready for a kitchen update? Your next beautiful space is only an afternoon away. Gather your tools, pick a fresh peel-and-stick tile that suits your style, and start building the home you love—safe, stylish, and budget friendly. Remember: Every quick fix is a step toward a smarter, cleaner, and more personalized home.