Imagine transforming your kitchen in a single afternoon, dramatically improving its appearance and value—without breaking the bank. The peel-and-stick backsplash trend is taking the home improvement world by storm, combining affordability, simplicity, and lasting style. With this DIY project, anyone can create a custom look and enjoy practical home hacks that boost everyday living.
Why Peel-and-Stick Backsplashes Are 2025’s Must-Try DIY Project
Homeowners across the country are embracing peel-and-stick backsplashes as one of the top DIY projects of 2025. This innovative material brings the timeless appeal of tile or stone without the mess, cost, or skill-level traditionally required for installation. According to Remodel Depot, DIY peel-and-stick products are booming in popularity thanks to their ease of installation and budget-friendly nature.(Remodel Depot, 2025)
The 2025 US Home Improvement Survey reports that 72% of homeowners are planning cosmetic upgrades this year, with kitchen improvements leading the way.(This Old House, 2025) Peel-and-stick backsplashes represent the perfect intersection of style, convenience, and cost-effectiveness, which explains why they’re now considered an essential home hack by DIY enthusiasts.
Statistics: The Growth of Kitchen DIY Projects
- Nationwide, peel-and-stick tiles account for over 40% of DIY backsplash installations in 2025, up from 15% just two years ago. (Dunhill Homes, 2025)
- The average DIY kitchen upgrade—including backsplash installation—can increase home resale value by up to 8%. (Remodel Depot, 2025)
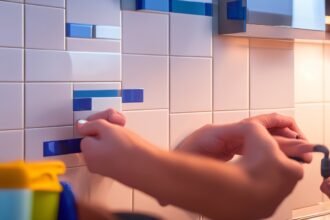
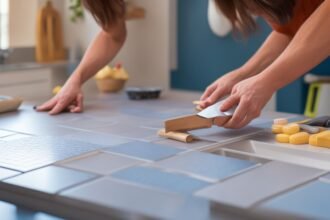
Step-by-Step Guide: Installing a Peel-and-Stick Backsplash
Ready to tackle your own kitchen upgrade? Follow these step-by-step instructions for a seamless, professional-looking result:
- Prep the Surface: Clean your wall thoroughly—use a degreaser if installing behind a stove. Dry the surface completely.
- Measure and Plan: Use a level and measuring tape to plan tile placement. Mark guidelines to ensure even rows.
- Cut Tiles to Fit: If needed, use a utility knife or scissors to trim tiles for corners or outlets.
- Peel and Stick: Remove the adhesive backing, carefully align the tile, and press firmly. Smooth with a cloth to eliminate air pockets.
- Finishing Touches: Use silicone caulk to seal edges, especially around sinks and countertops.
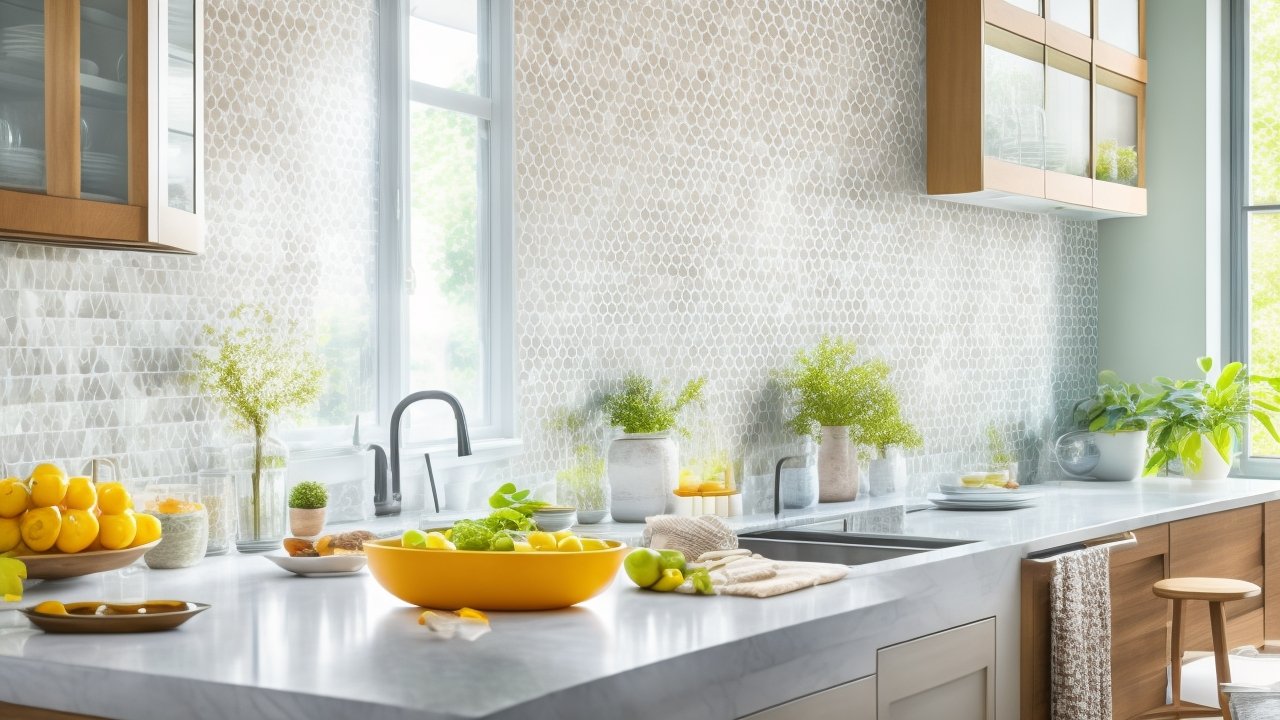
Material Choices: What Makes Peel-and-Stick Special?
Peel-and-stick backsplash materials come in various textures, colors, and patterns. Options range from classic subway tiles and marble looks to hexagon mosaics and bold geometric designs. Unlike traditional tile, peel-and-stick products require no grout or specialty tools, making them ideal for budget-friendly home improvement and renters who want a removable upgrade.
Choose moisture-resistant vinyl for behind sinks and stoves, or opt for eco-friendly, recycled PVC for an environmentally conscious project. Consider bold colors or matte finishes to create an on-trend accent wall that’s unique to your home.
Benefits of a Peel-and-Stick Backsplash Upgrade
- Easy Application: No mixing grout, no mess—just peel, position, and stick.
- Cost Efficiency: Materials typically cost 60–80% less than traditional backsplash installs.
- Design Flexibility: Instantly update your style with endless color and pattern options. Easily swap out tiles in the future.
- Low Maintenance: Clean with mild soap and water—no special upkeep required.
- DIY-Friendly: Suitable for beginners; most projects complete in under a day.
Useful Tips for a Safe, Successful DIY Backsplash
- Safety First: Always wear gloves when cutting tiles to protect your hands. Turn off electricity before working near outlets.
- Choose the Right Materials: For kitchens, pick heat- and moisture-resistant tiles. Avoid using paper-backed tiles near water sources.
- Plan Your Layout: Dry-fit your tiles on the wall before sticking to avoid gaps or uneven rows.
- Read Manufacturer Instructions: Each brand varies—follow guidelines for best adhesion and longevity.
- Work Slowly and Precisely: Double-check placements before pressing. Mistakes are easier to fix if you catch them early.
Budget-Friendly Hacks to Maximize Your Renovation
- Shop Sales: Home improvement stores often discount peel-and-stick tile during seasonal promotions.
- Repurpose Off-Cuts: Use leftover pieces to line shelves or create custom coasters for added cohesion.
- Pair with Other DIY Projects: Freshen up cabinets with a coat of paint or swap out hardware to match your new backsplash.
Peel-and-Stick Backsplash Inspiration: Trending Styles for 2025
Bring your personality into the kitchen! Top designs this year include dramatic herringbone patterns, muted earth tones, and glossy marble look-alikes. Pair geometric tiles with matte cabinetry for a contemporary feel or go classic with white subway tiles and brass fixtures. DIYers are mixing and matching tile shapes and finishes to create one-of-a-kind spaces, proving that customization doesn’t require a designer budget.
FAQ: Common Peel-and-Stick Backsplash Questions
- Is peel-and-stick waterproof? Most brands are water-resistant, but sealing edges with caulk enhances protection in high-moisture areas.
- Can you install peel-and-stick over existing tile? Yes—ensure the surface is clean and smooth for best result.
- How long does it last? Quality tiles can last several years with proper care, ideal for renters and homeowners seeking temporary or semi-permanent upgrades.
Reflection: Why Choose a DIY Peel-and-Stick Project?
Tackling a peel-and-stick backsplash is more than a home improvement hack; it’s an invitation to personalize your space and unleash your creativity. With each tile you place, you’re investing in comfort, style, and pride of ownership—without hiring a contractor or overspending. If you’ve been waiting for the right moment to update your kitchen, let 2025’s trend inspire your next step. The process is accessible, rewarding, and guaranteed to make your kitchen the heart of your home. Gather your supplies, set aside an afternoon, and join the DIY movement—your new favorite home upgrade awaits!